molding and casting
fab academy week 9
This week was about the different methods for molding and casting. The content of the class is here.
For this task, I want to make a mold to make a ceramic cooler. I was inspired by this model by designer Ellie Perry. It uses the same technique as the “zeer pot” that cools food by evaporation of the water contained in the sand placed between two terracotta pots. I had tested this technique a few months ago as part of low tech design interventions to use less resources.
The particularity of this shape is that it is hollow inside with just handles on the sides to be able to pour water between the walls of the box without being in contact with the food stored inside.
mold inception
As it is made with clay, I will have to slip cast it. I need to make a mold of the negative of the shape in plaster, leave 2 holes at the top for pouring the liquid ceramic clay and venting. After filling the plaster mold with the clay, I will have to wait a few seconds until the plaster sides absorb some of the clay and then empty the mold. This will leave me with the hollow shape expected.Another option would be to the same but with a wooden mold and cast the clay inside as wood would also absorb it.
I decided to do the option of a plaster mold which means ideally I would have to make: A 3D printed mold > to cast a silicon mold > to cast a plaster mold > to cast the final clay piece
I decided to skip the silicon step and directly cast the plaster mold in a 3D printed mold with the risk of having difficulties to unmold. It was a bad idea.
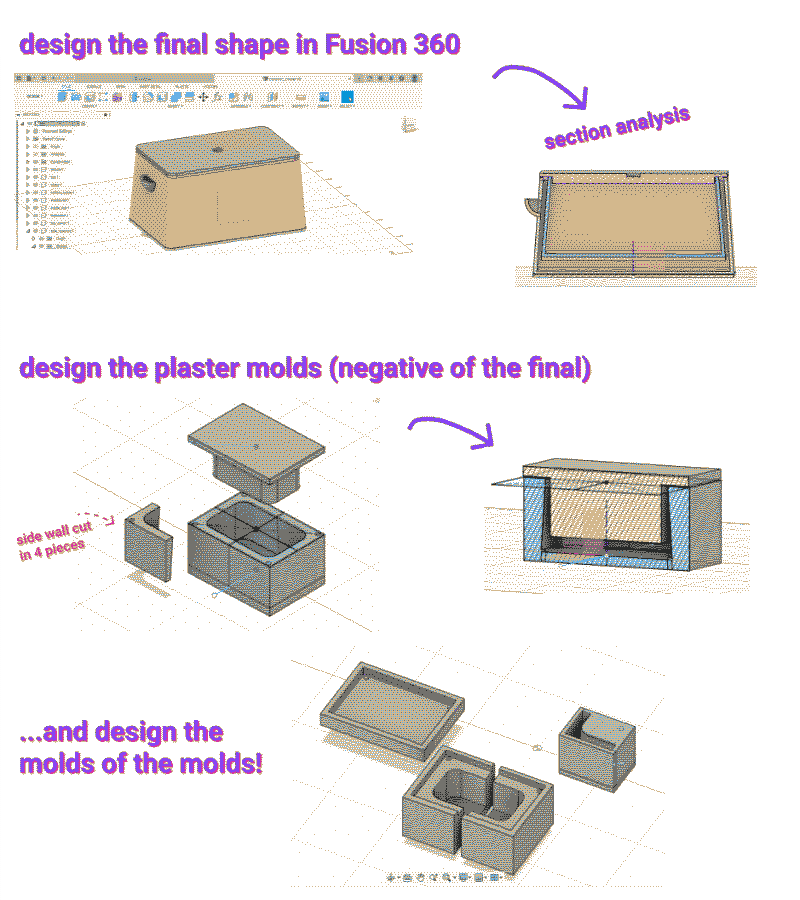
designing for molding
I started by designing the final shape in Fusion 360, you can see here a section analysis of the piece. It had a lid and a side opened handle for the water.Once the desired final shape was designed, I started to design what would be the mold of this shape. To simplify, I removed the lid and the handle as I can easily make them manually once the main piece it casted. The plaster mold is gonna be composed of 6 pieces: one for the top, one for the base and 4 for the side to be removed easily and because of the undercut. When making this mold, I changed the final shape to make staight lines inside the container to have less undercuts to take into account. I added small notches to be able to align the pieces together easily.
Last, I designed the negative shape of these plaster molds that I exported for 3D printing.
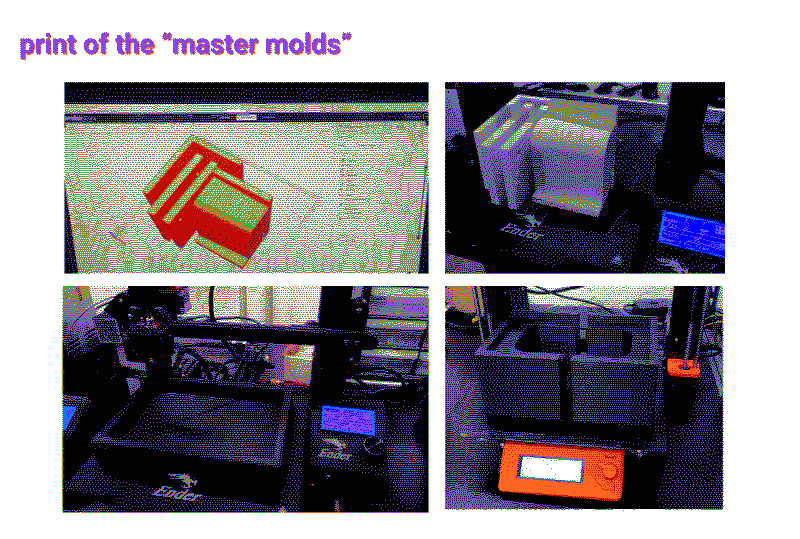
3D printing the mold of the mold
To fit on the 3D printers plates, I reduced the shape of the mold at 55% of its designed shape. This will make quite a small final piece but it allows me to test the technique.The print lasted about 12 hours on 3 different printers. After printing, I had to sand the pieces a little bit for them to align better.
casting the plaster mold
Next step was to cast the plaster mold in the 3D printed mold.This step is quite difficult. The first try was a fail because of the mixture of the plaster that I did: one was too dry, the other was too liquid.
For the second try, I followed some tutorials about the perfect plaster mix: pour first the water in a container leaving at least half of the container empty and start adding the plaster powder slowly until it starts forming a dry “island” on top. Then I can mix it and it is ready to pour in the molds. I taped the mold parts together, sprayed them with some relase agent and poured the plaster.
casting the clay shape
Right now, I am still blocked at the previous step, it has not been possible to remove the plaster form the 3D printed mold. I will do another try with maybe this time putting some plastic flexible layer between the mold and the plaster.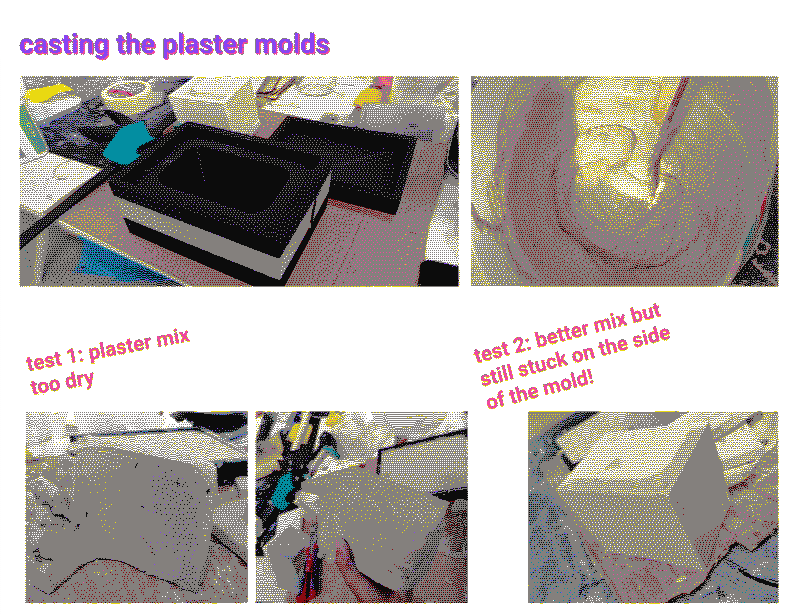
tools I worked with
Fusion 360Ultimaker Cura slicer
Ender 3 printers
Plaster
Release agent